Client & Prospect Contacts
With Scout, you can manage individual contacts for both client and prospect accounts. From each contact’s detail page, you can see their background, log interaction notes, set follow-up reminders, and keep track of all activities.
Note Make sure to switch to Business Development from the sidebar before initiating these steps.
ADD New Contact/Prospect
Easily keep your directory up-to-date by adding new contacts:
- Click the + Add Contact button on the contact list page.
-
Fill in the required details in the form, ensuring you enter the First Name and Last Name.
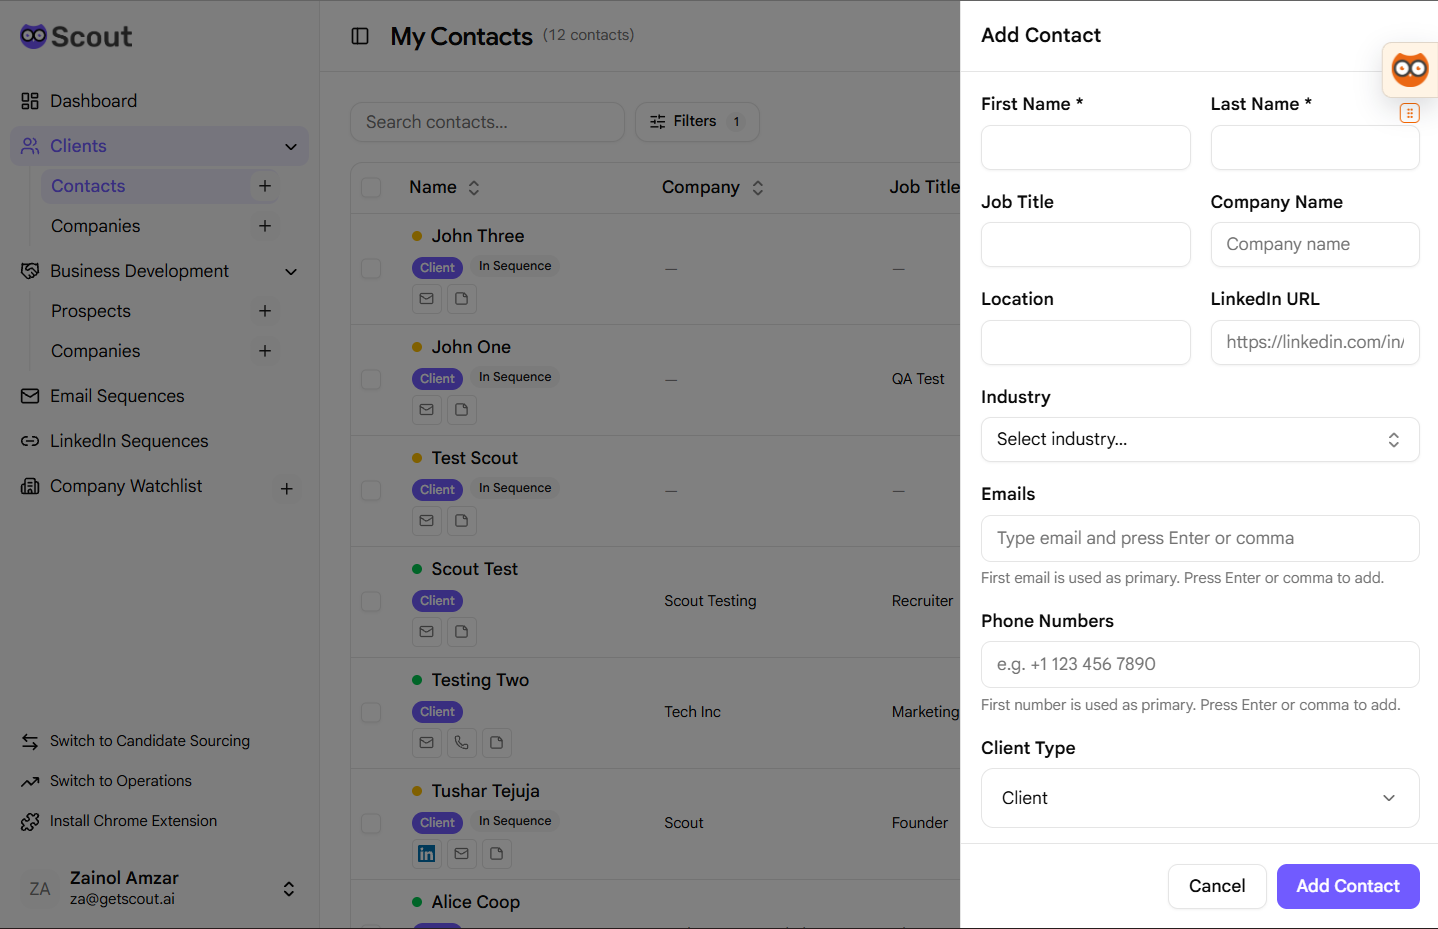
- Choose the Client Type, marking them as either a Client or a Prospect.
- Click the Add Contact button inside the form to save.
- Your newly created contact will appear on their respective page:
- Clients are displayed under Clients > Contacts.
- Prospects are displayed under Business Development > Prospects.
EDIT Contact Detail
Update contact details at any time to keep records accurate:
- Go to the desired contact detail page by clicking the name of the contact in the table.
- Click the Edit Contact button at the top of the details panel.
-
In the edit dialog that appears, modify the necessary fields.
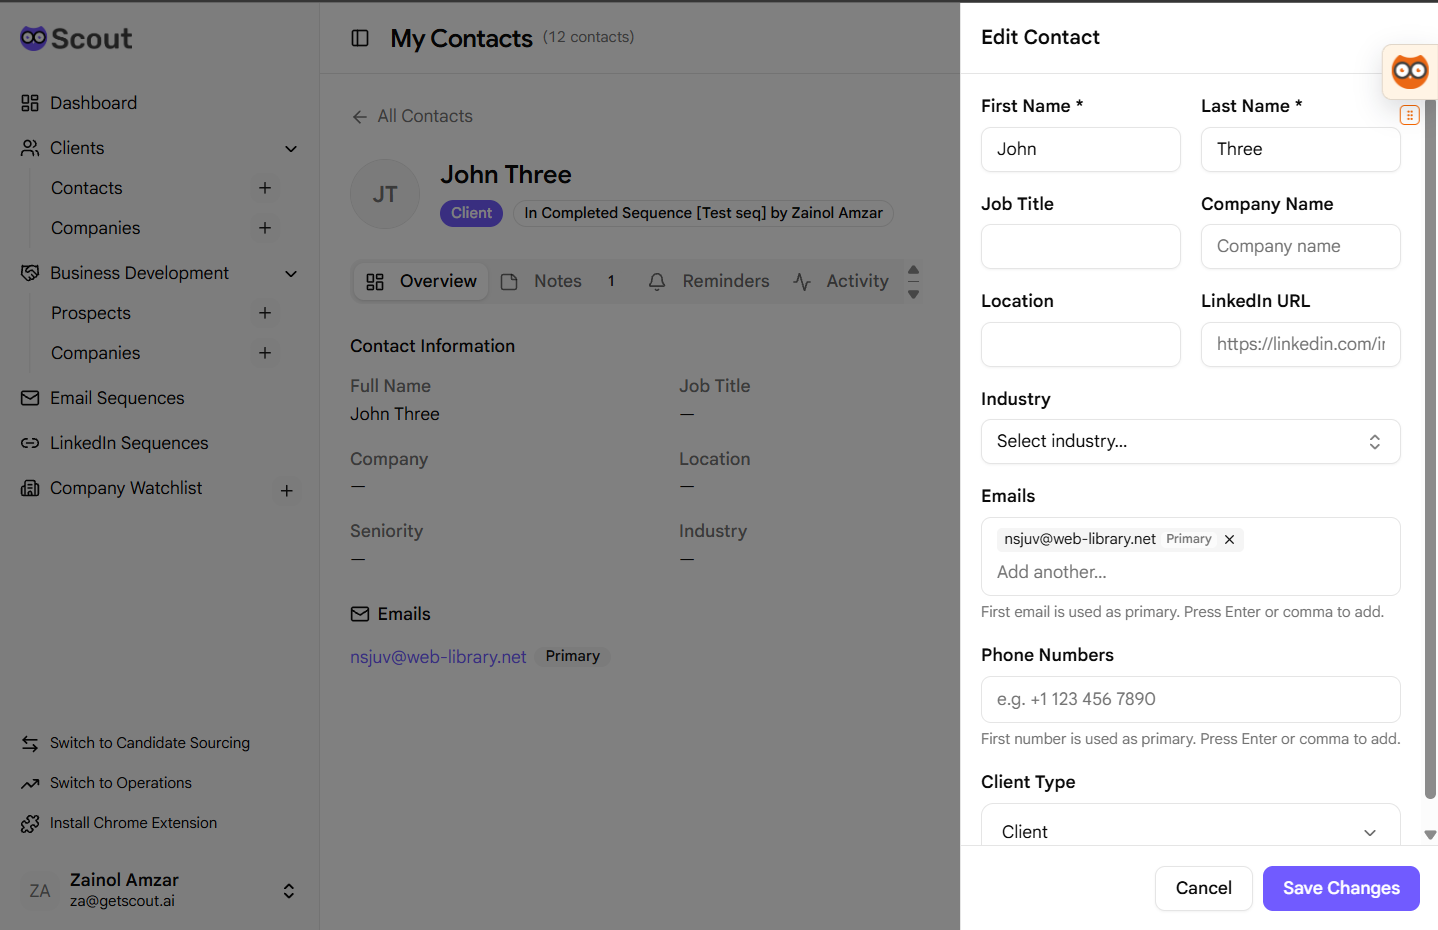
- Click the Save Changes button when you are done.
- The dialog will close, and the updated details will display immediately on the contact page.
ADD New Note
Document interactions and meetings with text notes:
- Go to the desired contact detail page by clicking the name of the contact in the table listing.
- Once on the profile, click the Notes tab.
-
Write your update in the Add a note… text area.
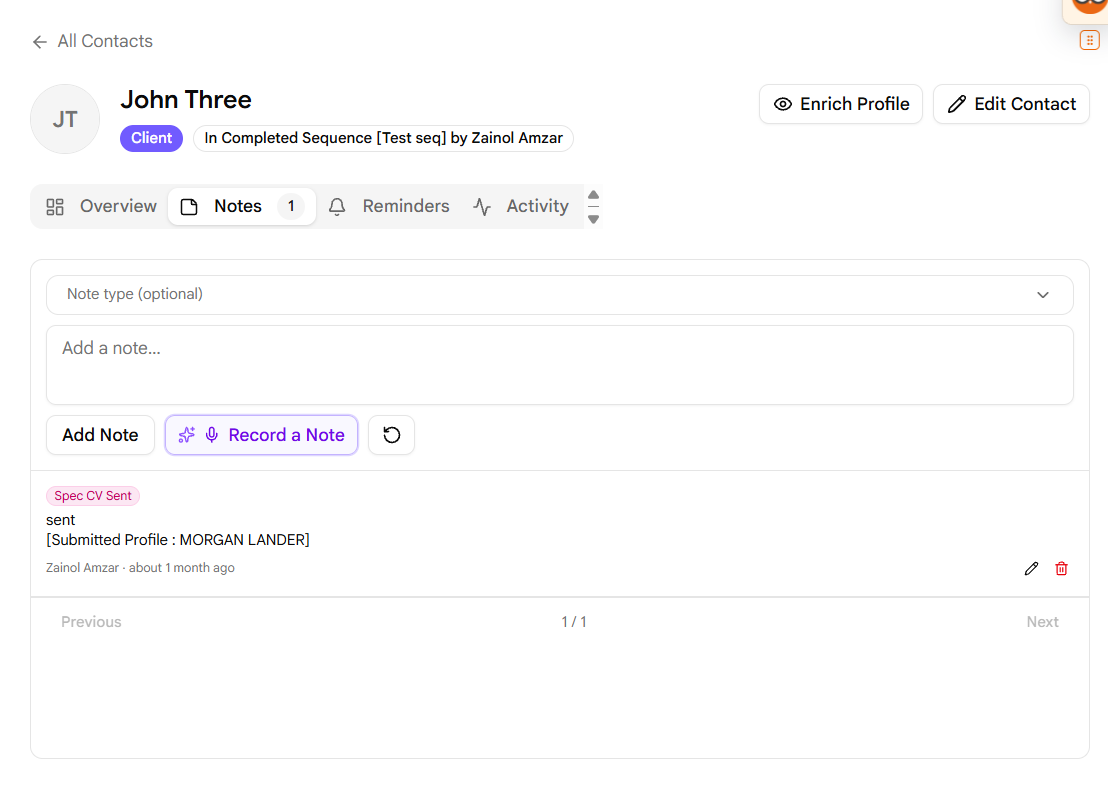
- Click the Add Note button below the text area.
- The new note will appear instantly at the top of the notes timeline.
ADD New Note by Voice
Log notes on-the-go using voice dictation or live screen-share context:
- Go to the desired contact detail page by clicking the name of the contact in the table listing.
- Open the Notes tab.
- Click the Record a note button.
- Record your notes using one of these options:
- Click Record mic to dictate your thoughts.
- Click Share screen to let the AI capture and summarize context from a live meeting or call.
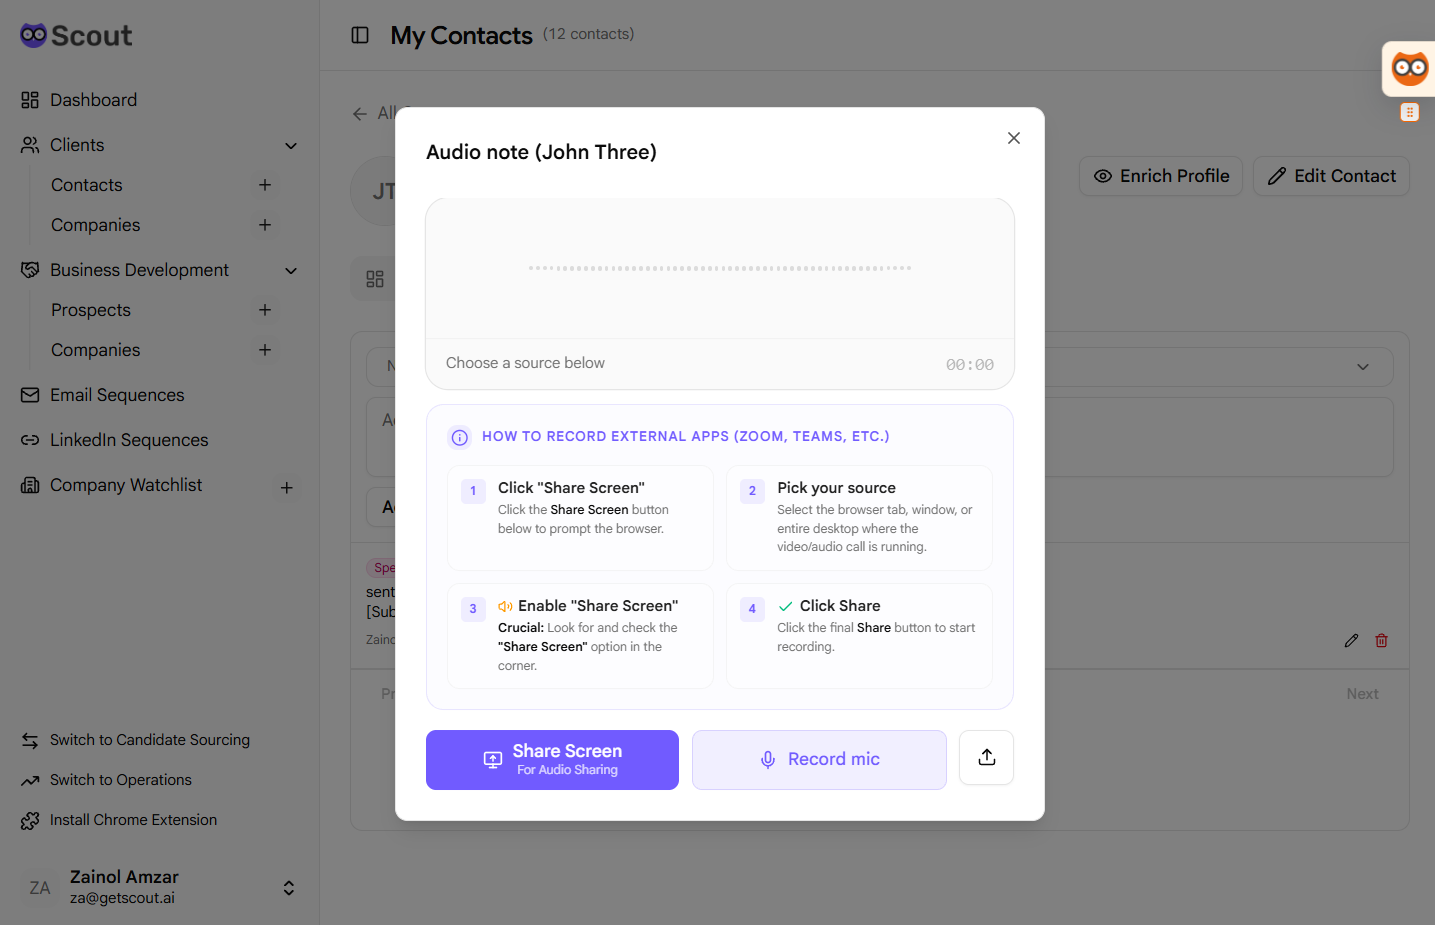
- End the recording to submit it. Once the AI finishes processing, the summarized note will appear on the timeline.
ADD New Reminder
Set up follow-up notifications to make sure tasks are not forgotten:
- Go to the desired contact detail page by clicking the name of the contact in the table listing.
- Open the Reminders tab.
- Write your task in the Add a reminder… input box.
-
Choose a due date and select the assignee from the dropdown list.
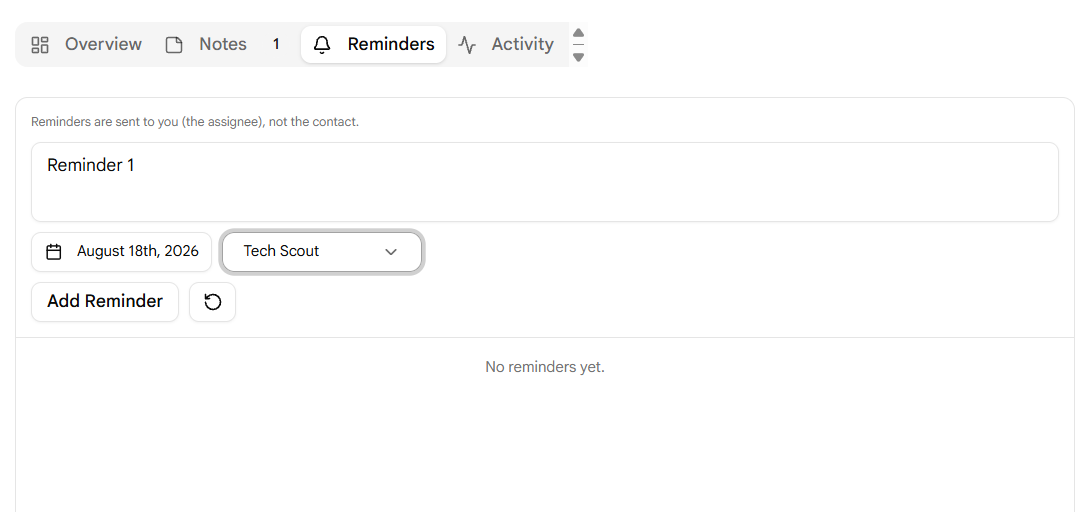
- Click the Add Reminder button.
- The new reminder will be added to the list.
- An automated email reminder will be sent to the assignee at 9:00 AM on the scheduled day.
ADD New Reminder via Notes
Let the AI extract reminders directly from your written or spoken notes:
- Go to the desired contact detail page by clicking the name of the contact in the table listing.
- Open the Notes tab.
-
Create a note (using either text or voice dictation) that mentions the contact’s availability or a follow-up date (e.g., “Schedule a call with John next Tuesday”).
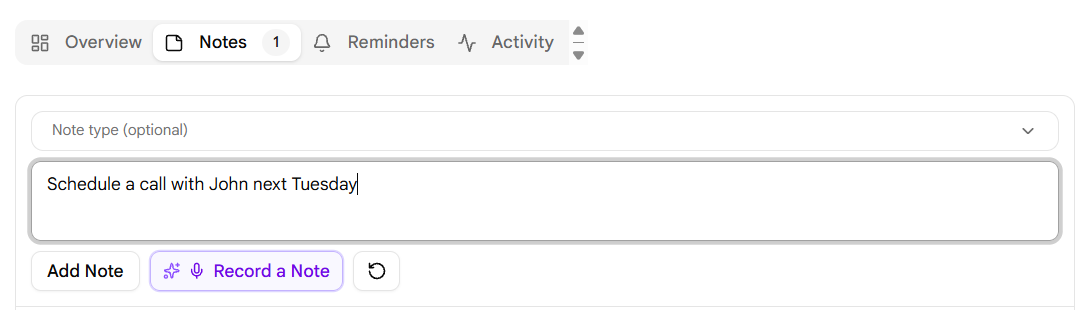
- Once the note is saved, the AI will automatically parse the scheduling details and create a new reminder in the Reminders tab.
- An automated email reminder will be sent to the assignee at 9:00 AM on that scheduled day.
Pro BD Tip
When logging call updates, speak or write down specific dates and names. The AI is designed to pick up scheduling phrases and automatically create actionable reminders in your schedule.