Email Sequence
Automated email sequences help you nurture relationships with client and prospect contacts. By setting up automated email touchpoints at scheduled intervals, you can check in consistently with business leads and nudge them to reply or schedule a meeting.
Note Make sure to switch to Business Development from the sidebar before initiating these steps.
CREATE a New Email Sequence
Follow these steps to build an automated email campaign for a business contact:
- Go to a contact’s profile page from the Contacts page.
- Check any contact from the table.
- Click the Add to sequence button.
- Choose Email as your Outreach Channel.
- Once the Add to sequence dialog opens, click + Create new Email sequence to create a new campaign.
-
In the New Email Sequence dialog, fill in the required information, such as the sequence name, add or edit the message steps, and optionally toggle Send first message immediately.
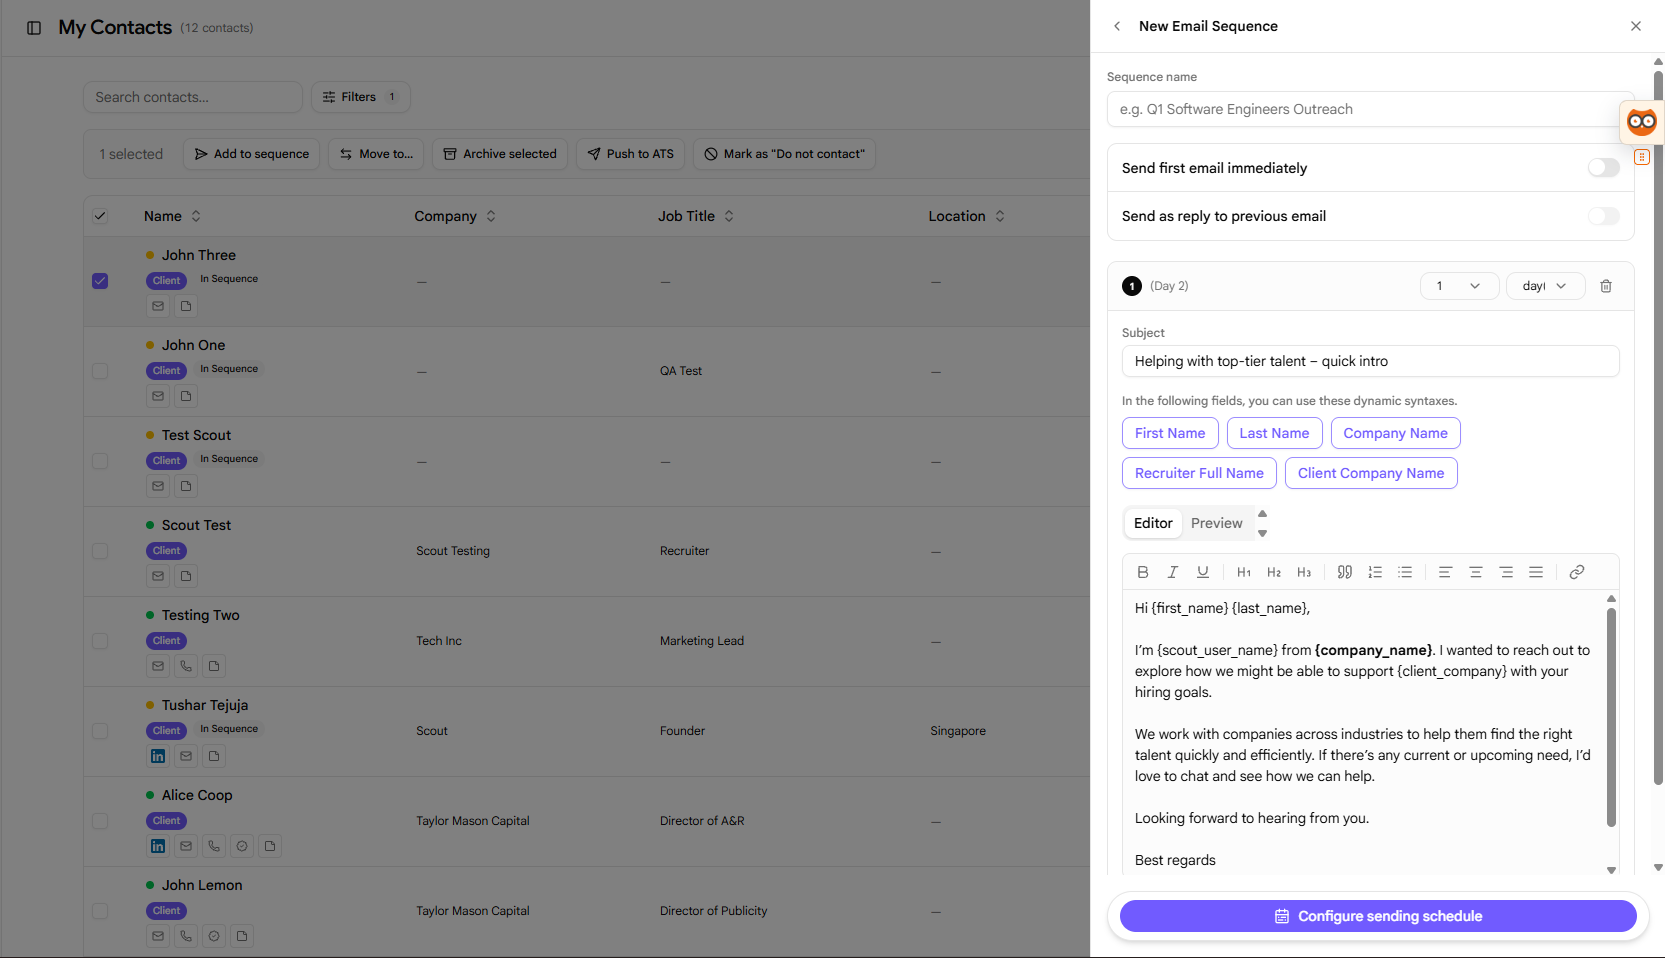
- Click the Configure sending schedule button to continue.
-
In the Sending schedule dialog, set up the preferred sending windows for the sequence.
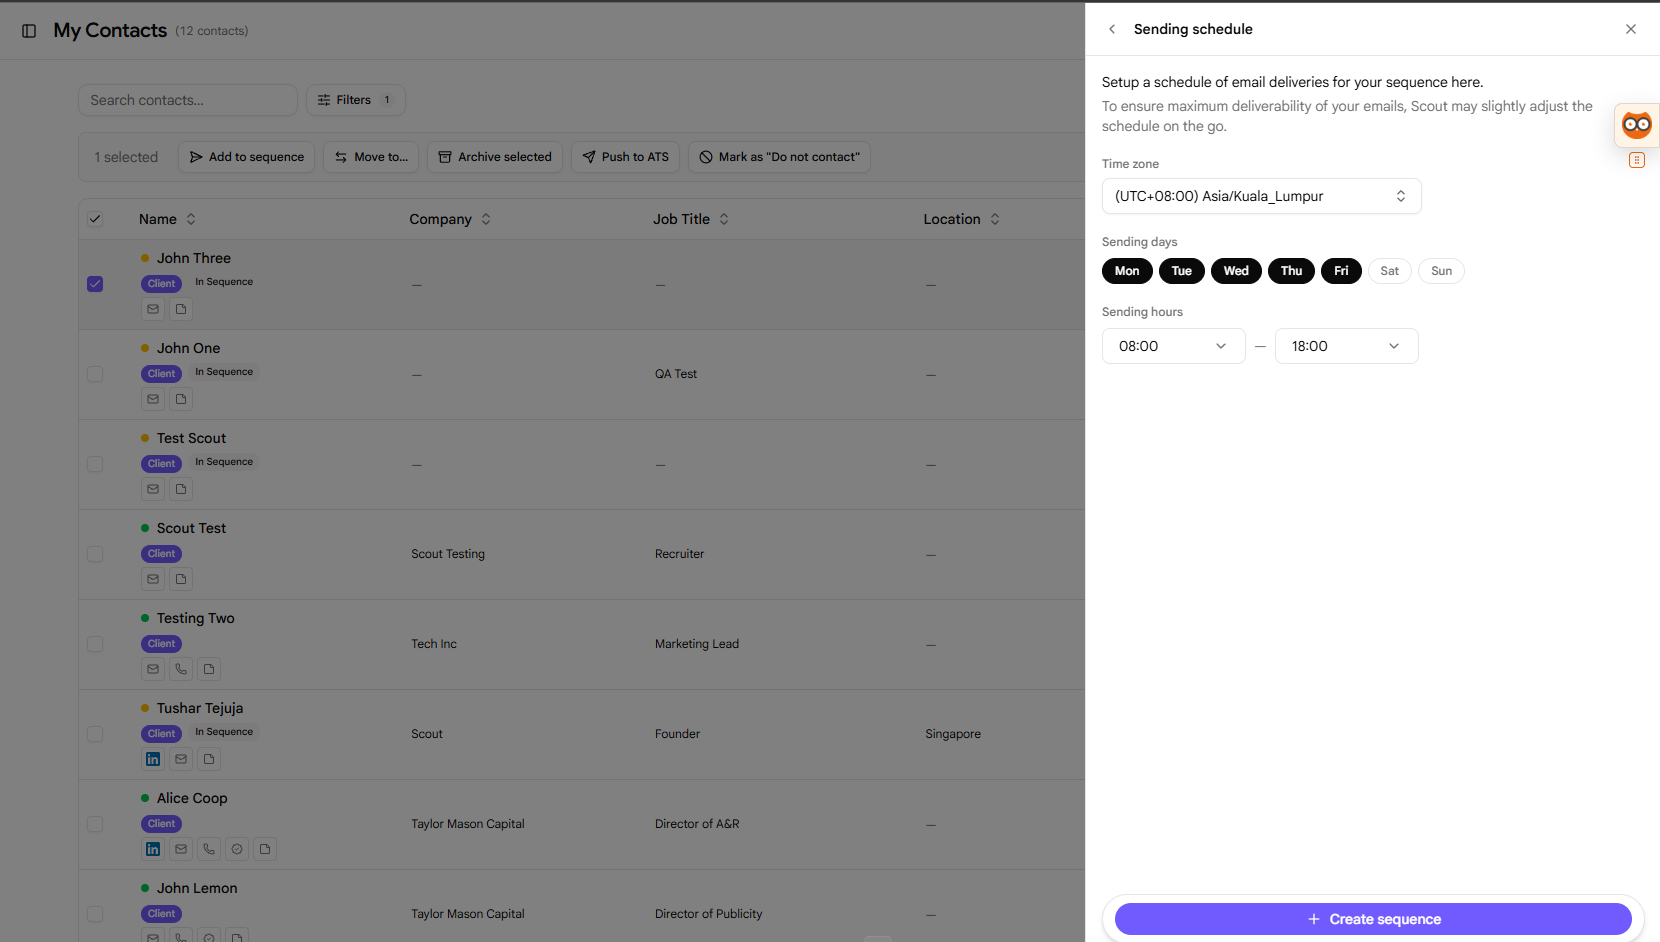
- Click the + Create sequence button.
- You will be redirected back to the Add to sequence dialog with the new campaign selected.
ASSIGN an Existing Sequence to a Contact
You can assign pre-configured email sequences directly to any client or prospect:
- Check any contact from the table.
- Click the Add to sequence button.
- Select Email as the Outreach Channel.
-
In the Add to sequence dialog, select an existing sequence from the dropdown and click the Choose an Email sequence… button.
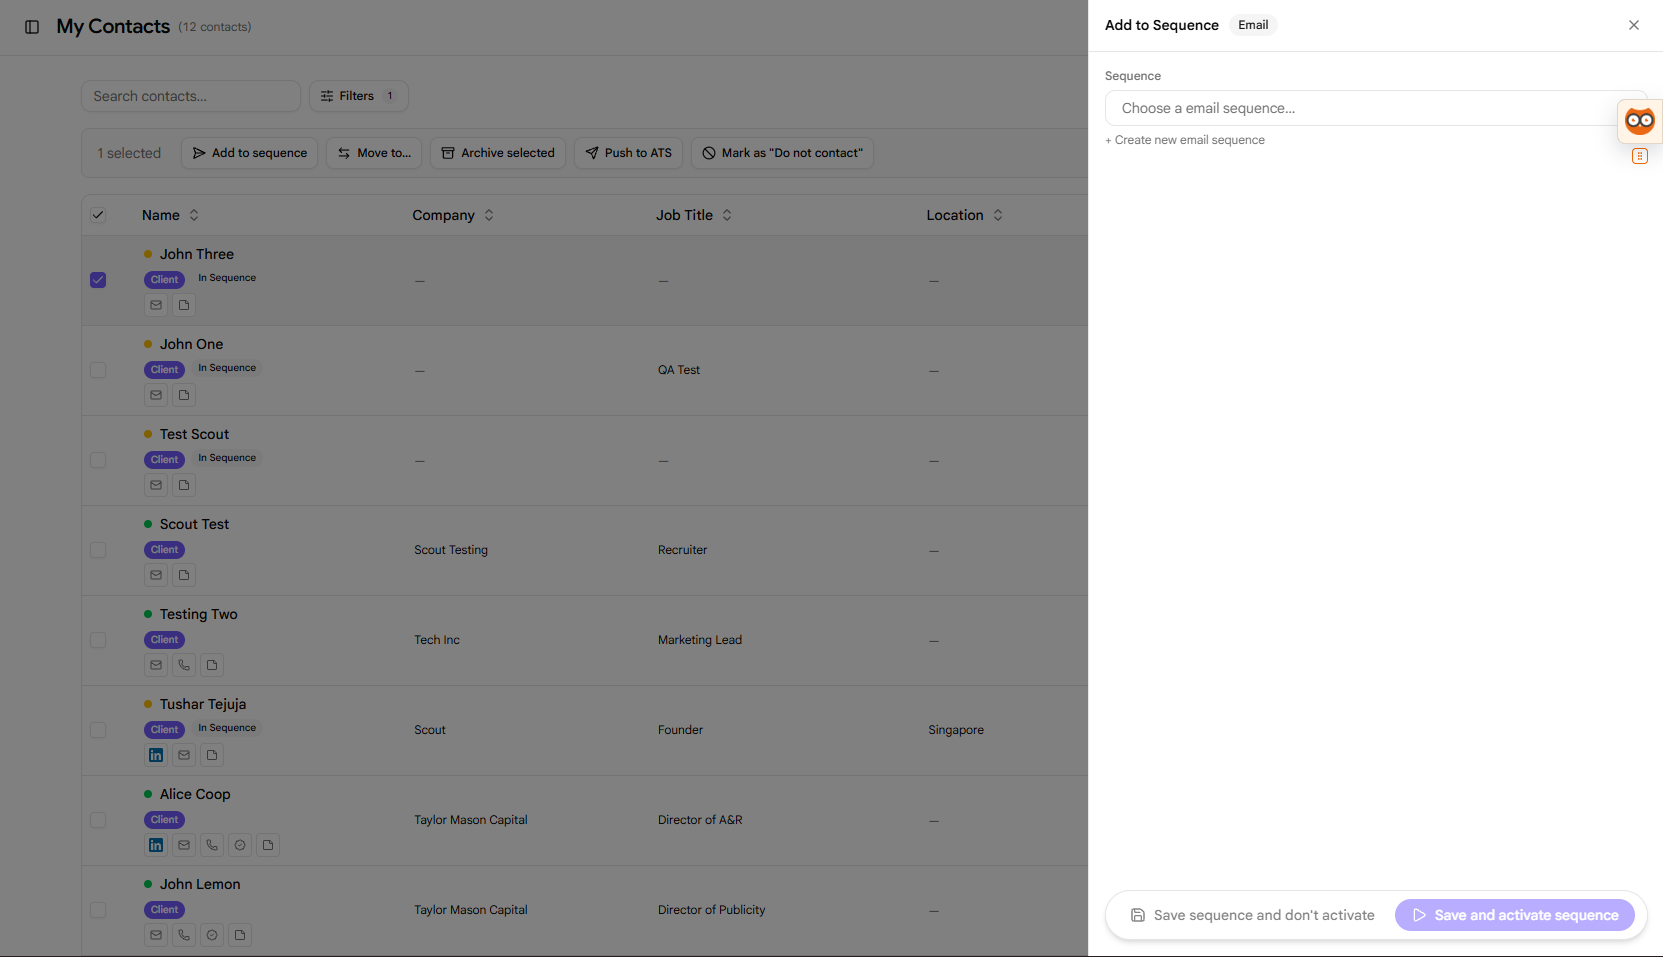
- Choose either Save sequence and don’t activate or Save sequence and activate it to finalize the assignment.
EDIT an Email Sequence
Update templates, change messages, or reschedule sending options for an existing campaign:
- Navigate to the Email Sequences settings page from the sidebar.
- Click the Edit button in the Actions column for the sequence you want to modify.
-
The sequence editing page will open. Here, you can edit details, add steps, revise messages, or change the active timing in the Schedule tab.
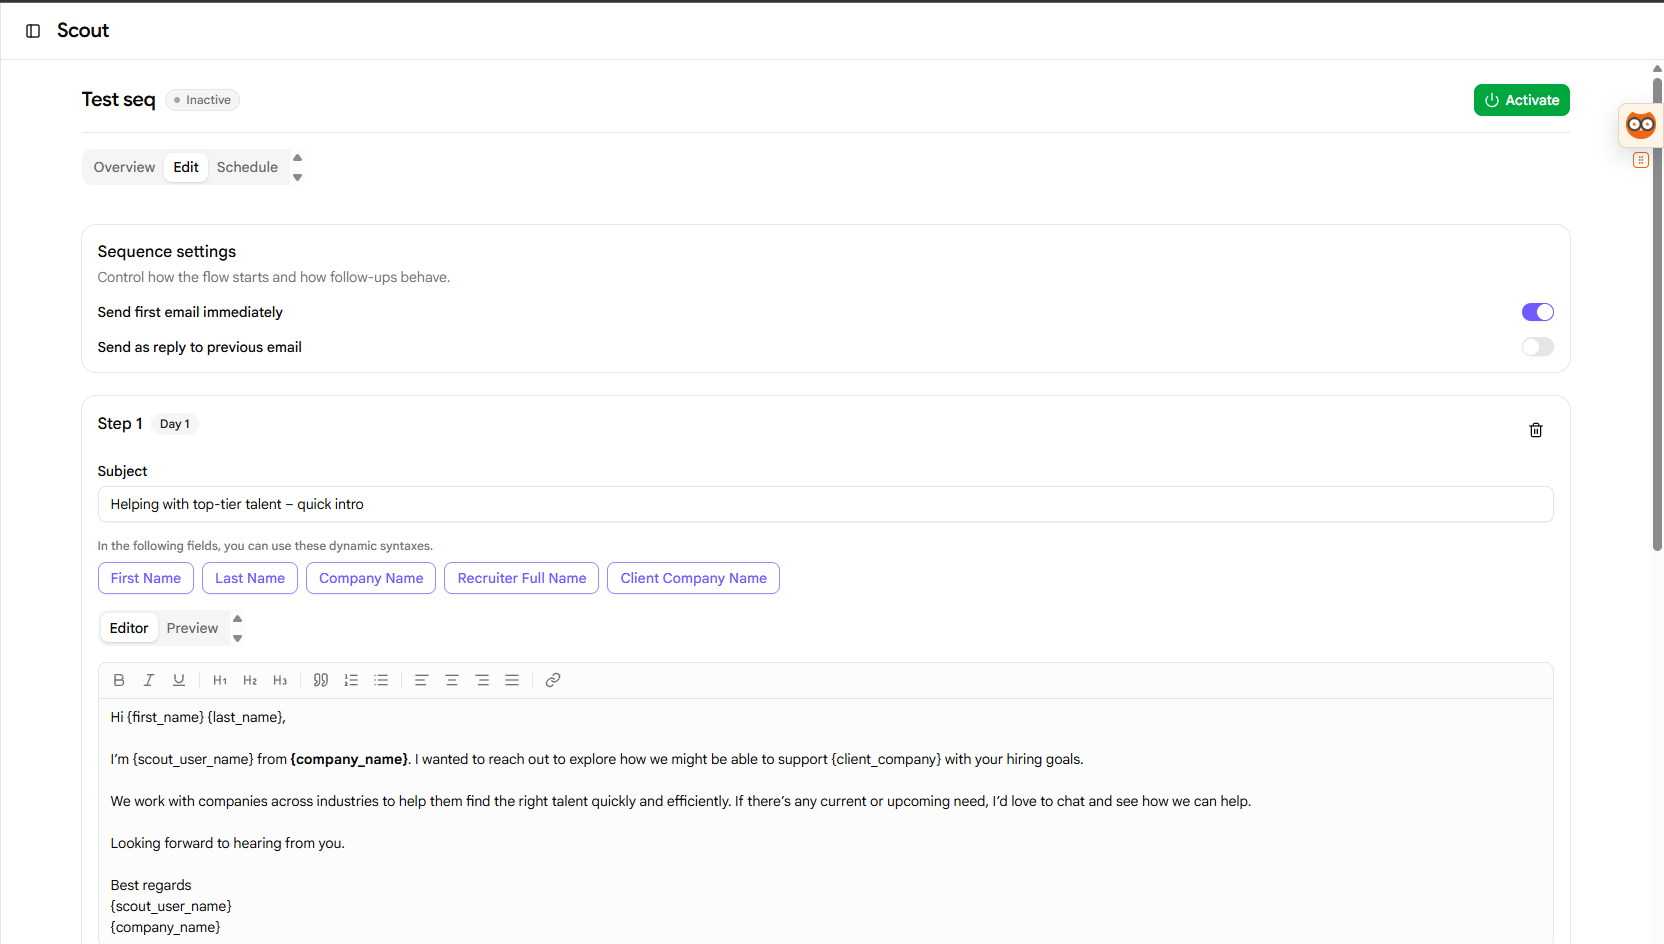
- Click the Save button when you are finished.
MANAGE Email Sequences
Control active engagements or delete outdated business sequences:
- Navigate to the Email Sequences page from the sidebar.
- Locate the sequence in the table list.
-
Click the Toggle button in the Actions column to pause or resume outreach.
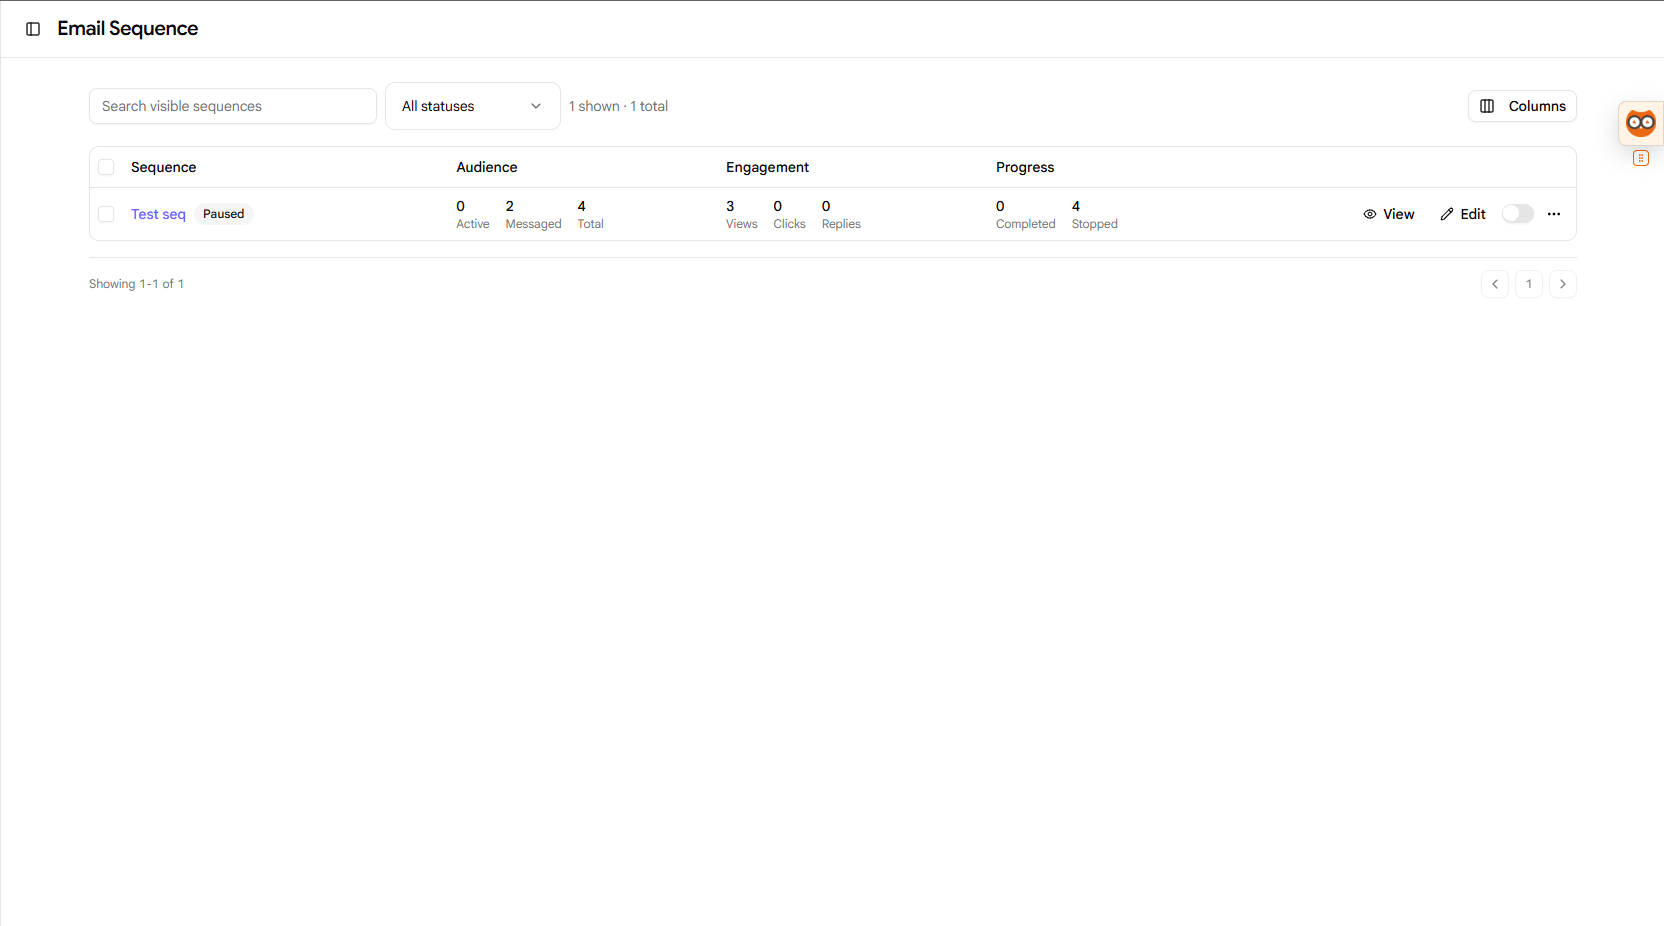
- Click the three dots (…) button next to the toggle and select Delete to permanently remove the sequence.
Pro BD Tip
When building sequence steps for business development, focus on addressing client pain points and highlighting relevant market intelligence in your emails. Keep your touchpoints spaced out to remain helpful without being intrusive.